

Winter Walking
With its wild weather and long darkness, winter is the toughest time of year on the hills. Add snow and ice, axes and crampons, cornices and avalanche risk, and you're right up at the most serious end of the walking spectrum. Winter beginners have a lot to learn, but even after a lifetime of snowy seasons it's still possible to pick up new tricks.

We've asked a panel of pros for some hard-earned advice. From key bits of kit to essential skills and safety concerns, these tips should help keep you happy and healthy on the winter hills.
Always bring axe and crampons

"Early-season snowfall always seems to be accompanied by a flurry of speculation around whether this equates to a need for winter kit, and it's entirely reasonable for people to not be sure" says Winter Mountaineering and Climbing Instructor (WMCI) Jamie Bankhead.
"Light cover, soft and unconsolidated snow, relatively mild temperatures might all equate to a valid decision to manage without, and often just being able to use stiffer-edged boots and walking poles will be enough. However, there is a huge difference between not using the kit and not taking it. The above should be seen as a dynamic decision, made on the spot when the immediate evidence is in front of you. Hills that don't look very cold or snowy from the car-park can be surprisingly so when you get to the high ground, and it might only take a short section to scupper your day if you can't cross it safely."

"If we accept that crampons on or off could be a life-saving or life threatening decision, then it's one that we have to be able to make. And we can't do that if we've left the kit in the car for the sake of saving a bit of weight, or if we've been persuaded by some random social media source that we don't need them. This is confirmation bias at its most dangerous: just because Mr X had a manageable day on a certain route without crampons on Thursday, it doesn't therefore follow that 24 hours later Ms Y won't have a nightmare if they try to do the same. Different confidence levels, subtle changes in temperature or of weather, could lead to a very different experience.
"The base level for any winter walking day is in my opinion least a B1/C1 boot and crampon combination. This does involve some outlay, but it's clearly money well spent. Micro spikes and similar have been shown to work on certain ground, but the best they're going to allow you to do is to nibble at the edges of the true winter experience and may prove seriously limited when things tilt up a bit. I've helped pick up the pieces when this has happened, and it wasn't nice.
"Get the full experience, pack the full kit. Winter is a time of magnificent opportunity, but it doesn't take prisoners, and for the extra weight of an axe and crampons, surely it's a no-brainer?"

Keep a weather eye out

"It's life Jim, but not as we know it! And the same can be said for the current stop-start winter!" says Ben Gibson, Part-Time Mountain Safety Advisor at Mountaineering Scotland.
"There is snow, but not as much as we often see at this time of year. I do have to remind myself that winter is a season and not just snow on the hills. Whatever the ground conditions we still must be suitably prepared with good winter skills, appropriate equipment, solid navigation and spend the time planning (the Be Avalanche Aware process is a great tool for this), as the weather can change dramatically within a few hours."

"Regularly checking a few different weather forecasts, such as Mountain Weather Information Service and Met Office Mountain Forecast, along with the Scottish Avalanche Information Service or other ground conditions reports, will help you to get the big picture of what is happening, what the hazards are and where they are. This combined information will allow you to spend time planning a few route options which are suitable for the conditions, and for you or your group.
"Wind: This is the big issue in winter, as it can affect mobility, make you very cold, and it can make or break a safe day in the mountains. Snow will be moved around to different slopes and aspects, which present avalanche hazards that you will want to avoid.
- For more on wind speed and its effect on you, see here.

Visibility can certainly change quickly, so being prepared with good navigation skills to keep track of your location is vital. Modern technology is a wonderful thing and phones, GPS and other location devices can give us that 'quick fix' but (and a big but too), batteries hate the cold! So having solid map and compass skills is essential."

"Temperature/Freezing level: One thing that snow doesn't like is rapid change. Large fluctuations in temperature throughout the day can cause the snowpack to potentially weaken. For example, cornices will be prone to collapse. Be mindful of where your walks may take you, either near to or below outcrops and cliff edges where cornices form. A collapsing one can be a trigger for a loaded snow slope to avalanche."
- For more seasonal advice from Mountaineering Scotland, check out the ThinkWINTER campaign.
Navigation is a winter necessity
"A map and compass are absolute essentials" says Ben Gibson.
"Knowing the basics (map setting, compass bearings, contour interpretation, slope angle & aspect) is the foundation for all the other skills that will help in your successful navigation around the mountains when the weather turns bad. Mountaineering Scotland and Glenmore Lodge are great organisations that provide expert learning in mountain navigation skills, which every hill goer should have, while the alternative down south is Plas y Brenin.
"Be familiar with various map types, scales and brands. They all work well and give good information, however some work better in winter than others. 1:25,000 scale maps have lots of detail, but these details disappear under lots of snow and this makes it harder to interpret features from the ground to the map. 1:50,000 and 1:40,000 scales work best for winter as they cut out the fine details and show a better picture of the land using the contours."

"Think about technology too. Phones with location apps are a useful addition to your map & compass, as they give you the fast fix, but in wintery conditions the batteries don't last long, and they can be fiddly to use with your big winter gloves. I do encourage people to download OS mapping software and OS Locate, and I use them myself - but it is my back-up to the map.
"However your winter walking adventures are going this season, be sure to plan (and have multiple options), have the equipment to look after yourself, know how to use a map & compass (and carry them with you obviously) and have the skills and experience for the winter environment. Above all, never be ashamed to turn back and go home or just don't go out at all! Stay safe and venture happy."
Be Avalanche Aware - Interview with Mark Diggins, IFMGA Mountain Guide and Co-ordinator of the
Scottish Avalanche Information Service
"Avalanches are not just a concern for winter climbers" advises Mark.
"Walkers and skiers also go into avalanche terrain quite frequently, many summer paths that head up corries for instance enter avalanche start zones. These are places where avalanches can be triggered, and are usually when the angle approaches 30 degrees or so. Therefore it is really important to look at the avalanche hazard report for an area and establish where your proposed route may go in relation to the indicated avalanche hazard on a particular slope aspect."
How common are injuries and fatalities in Scotland?
Unfortunately injuries are very common if one is caught in an avalanche in Scotland, since even a small avalanche can carry a person into or over nasty terrain. This is the nature of our terrain and the usual snow cover.

What proportion of victims trigger their own avalanche?
Statistically it has been established via data throughout the world that 90% of the time if someone is caught in an avalanche then they or their party will have triggered it.
Can you briefly explain the main factors that feed into the forecasts of avalanche hazard?
The main factors that determine avalanche hazard are:
1. We identify what the problem is. There are five main problems (these are identified in the avalanche report by icons/symbols called "key snow stability observations"):
- Wet snow avalanches
- Weak layers in the snowpack
- Windslab
- Glide snow avalanches (spring)
- New snow
2. We identify the location of the avalanche problem and its distribution.
3. We work out the likelihood of an avalanche release - this depends on how sensitive the snowpack is, the avalanche problems or stability factors and how widespread in the landscape.
4. Avalanche hazard level is determined by combining the likelihood of avalanche release and the size of the potential avalanche. The avalanche hazard level is independent of any avalanche impact on a person or infrastructure. Therefore it is important to read the avalanche report text carefully to determine the detail. It is possible to be avalanched at any avalanche hazard level.

What about cornices?
Cornices are an unpredictable hazard and therefore one should be alert to when they are indicated as a threat on our avalanche reports. They can produce huge amounts of debris if they collapse, and this can travel to lower elevations.
What are the steps walkers should go through when planning a day out?
Our Be Avalanche Aware process describes the steps to go through both at the planning stage, and then what you look out for on the hill:

- In-depth advice and resources are available on the BAA pages.
- The BAA app can be also downloaded via the SAIS website
- For the latest avalance forecasts from six areas across the Scottish highlands see sais.gov.uk
If you're heading to an area outwith the SAIS forecast regions, are avalanche reports still relevant?
Avalanche reports can be used for adjacent areas and give a general indication in terms of aspects and hazards. The spread of our six operational areas throughout the Highlands gives a pretty good indication of the avalanche hazard in a geographical context.
If SAIS are indicating a high risk day on some aspects, does that mean you should stay off the hills altogether?
The information that we provide can be used when planning your trip in terms of both area choice and route choice in your chosen area. There are always options and places to go no matter what the avalanche hazard may be.
In terms of your safety and the safety of your friends, where does ultimate responsibility lie?
The responsibility for your safety and enjoyment will always be on your own shoulders - indeed one of the greatest attractions of the outdoors is that you have the freedom to make your own decisions in terms of where you go and what to do. The exercise of measuring your ability and skills against the weather and mountains is a constantly changing dynamic.

Gloves, gloves and more gloves
"I've come to a few conclusions about gloves, and the first is that they have a fundamental design flaw - a big hole at the end where you put your hand in" says Jamie Bankhead.
"This contributes to it being very unlikely that your hand-shoe of choice is going to stay dry all day in varied weather and while it is being repeatedly immersed in snow. The solution? For me it's simple, buy 'em cheap and stack 'em high. I consider three pairs of gloves the minimum for a winter day and often take four, although that is influenced by the thought that I might need to provide a back-up pair for a client. Sometimes I do get through the whole day with one pair, but that is a relative rarity.
"The first pair I put on at the car will be relatively lightweight and are essentially 'sacrificial', as they will be keeping my hands covered during what is often a brisk approach to the high ground, but I'll put on something more substantial when we get more exposed to the elements, or if I think we might be deploying the rope. Often this will coincide with layering up some of my other clothing, and/or the first snack stop of the day, all of which ties in with my mantra of 'make each stop count', as in doing all the little jobs in one stop rather than several."

"My main pair of gloves needs to be warm, obviously, but also dextrous enough to keep an ice-axe under control, manage a map and compass, open clothing and rucksack closures, and possibly tie a knot in a rope if that is required. This can seem like quite a tall order, especially if your hands run at the colder end of the spectrum. Historically mittens have had their advocates, as they share the heat of each finger, but I personally struggle to do anything fiddly with them (especially when my compass is icing up), and many of my clients have found the same. They can however be a winner for "emergency warmth", not least as they're easy to get on over frozen or wet hands.
"There are a plethora of gloves and different materials on the market, and I don't intend to review them. As with everything else you just have to find out what works, while keeping a grip on the budget, because firstly you need a few (getting them dry overnight in a hostel drying room doesn't always happen), and also... you're going to kill them. Gloves are very much on the frontline of the winter rough-and-tumble, especially if you're doing anything amongst scrambly rocky ground, so it grieves me to tell you, they aren't going to last. Applying a bead of seam-grip or similar over the stitching is one useful hack I'd recommend, but they're still going to die! Choose your price-point accordingly.
"Silk liners or wrist covers can also make your hands a little warmer, but it may be worth looking at the bigger picture. If our body core is under-heated then that will reduce circulation to extremities; it's our body's natural crisis-management strategy. Instead of trying to make a huge pair of mitts work, maybe think about an extra jacket, or some more food. It's all connected..."
Don't be misled by other people's opinion

"I have lost count of how many people get themselves into a state because they have read something either online or in a book" says WMCI Di Gilbert.
"One person's 'steep' is another person's gradual; one person's 'exposed' is another person's little bit airy and one persons 'windy' is another person's gentle breeze.
"We all have different thresholds and it's important that you develop your own understanding and guidelines. For example, I will fully admit to having a collection of guidebooks on my shelves, and I do consult them, but I am very selective about what information I extract from them. I am only interested in the route plan from the map, forgetting about all the fluff around the edges. When I see where a route goes on a map, I get my own map out and study it, looking at contour intervals and expected terrain to be encountered. I quite enjoy post hill walking day reading the description to see what they said, but I'm more interested in my own thoughts."

Buy smart
"As a general rule, I want a piece of equipment that will not just do me during the winter season but all year round" advises Di Gilbert.
"I used to think that I wanted a piece of equipment that would last forever but this is no longer true. Technology moves on, trends change, fashions change and although I do have equipment that will outlast me I upgrade periodically when something better comes on the market. Therefore, when I get equipment now I want to use it lots and lots and for it not to go mouldy as it lives in the cupboard for seven months of the year. I normally have equipment that is designed for winter use, because this is certainly the most challenging environment, and then use this for the rest of the year where practical."
Look after your gear...
"...Because it looks after you" says Di.
"When I start to sniff the drop in temperatures and the first flurries of snow on the hill I winterise my equipment. My lightweight summer equipment gets put to the back of the cupboard and drawers and I locate any winter-specific kit (often the biggest challenge). I have a quick check that everything looks good, crampons are fitted to boots, full batteries in head torches and my emergency kit is bulked up. After every hill day I have a routine - drive home and unload equipment. Not just chucking a rucksack in a room to fester: everything gets taken out of my rucksack and aired, even things in dry bags. Shelters get opened up and poles get fully dismantled to prevent them seizing up. Leather boots get regularly treated and damaged equipment gets repaired - either on a short term or more permanent basis depending how much time I have."

Look after you
"The winter environment is hard on the mind and body, and as years creep up you need to start looking after you" says Di.
"I only ever carry 330ml of liquid in winter on the hill and know that I will be dehydrated when I return to the car. I always make sure that I have a litre of liquid in a drinks bottle in the car so that I can start the rehydration process as I head home. I normally have some lunch left over in my rucksack which I will munch on too so no need for extra food. I never stretch when I come off the hill, that's just impracticable for me for lots of reasons, so when I have a rest day I do some yoga. Not a class since that definitely won't work for me but just through streaming channels when I can fit it in at my leisure. About 12 months ago I started to regularly go to sports massage - just once a month which is practical and realistic for me. It's my personal MOT which I wouldn't give up now.
"Keeping interested is important too. We all have our favourite/local hills we trudge up but I love exploring new areas and seeing new sights. A visit to a new area definitely sparks my motivation for hills."
Di's three little things that make a big difference
1. Goggles. Goggles that work. Goggles that double up as ski goggles. Make sure that they fit your head size - for little framed people look into kid's goggles. A good lens is nice but by far the most important thing is that they are a completely sealed unit. What I mean by this is that they have the foam all around the lens, with no air gaps at all. Any air gaps will instantly fill up with spindrift and render them useless. Once I put goggles on, they are on for the rest of the day - do not them take on and off because that will also render them useless.

2. Navigation. Download the OS Locate app onto your phone and make sure that you can read grid references and apply them to the map. Download offline maps onto your phone as an emergency backup. Blow up a 1:50,000 map to 1:25,000 scale, and print it out. I have the intricate piece of the day's journey blown up to this scale but also have a printed 1:50,000 on the other side of the whole day. Do not laminate this because when icy, compasses will just slide off. Use a good grippy and flexible map case - A5 size for me since this comfortably fits into a jacket pocket.
3. Gloves. Lots of gloves. Thin ones, thick ones and emergency ones. Don't be shy about going into a shop and trying gloves on. Then try to use a compass or put your crampons onto your boots. Gloves are like goggles. Once they are on, they are on. They need to be dextrous, and up for the task in hand.

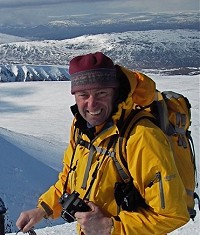
Don't forget your camera!

"Winter conditions in the hills can produce exceptional opportunities for photography" says pro photographer and UKH contributor James Roddie.
"The transformative effect of snow, combined with the low angle of the sun, can create scenes of sensory overload. So whilst it may be tempting to leave your camera at home to avoid adding weight to your already heavy pack, it is always worth taking it along.
"It is best to keep your gear as streamlined as possible. Modern mirrorless cameras are small and lightweight but offer excellent quality, so these cameras are ideal for winter hill photography. Unless you are a serious photographer with specific needs, try to take just one lens with you on the hill - changing lenses whilst you are stood in a cloud of spindrift is not going to do your equipment any favours. A zoom with a wide focal range is ideal, to give you as much versatility as possible (such as a 24-105mm lens). It is worth noting that many cameras and lenses are not weather-sealed, so it is strongly recommended to take along a rain cover for your kit.
"Cold temperatures have a way of draining camera batteries quickly, so try to take along at least one spare. If you find that your camera is particularly prone to poor battery life, then put a couple of hand-warmers in your camera bag - it can make quite a difference. A lens cloth is also essential, to wipe off any spindrift or rain.
"The most photogenic light is often around dawn and dusk. These conditions often require long shutter speeds, making it very difficult to get sharp images whilst hand-holding your camera. So if you can justify the weight in your pack, it is well worth taking along a lightweight tripod.
"In cold conditions, it is best not to linger too long in any one place to take photos. Photography can be very engrossing and it is easy to lose track of time. Not only can this make it harder to complete your planned route in time, you can also find yourself becoming dangerously cold without realising it. A 'Grab and Go' approach is recommended with winter hill photography - don't miss good opportunities for photos, but don't be constantly using your camera."