This topic has been archived, and won't accept reply postings.
Thinking ahead to 2013, where would be the best place to go for a long weekend where I can tick the most Munros on a 1 day walk and what are there names. Reasonably fit and ok scrambling.
In reply to Russell Lovett:
The easiest big haul is the south Glen Shiel ridge, starting from the Cluanie Inn: 7 munros for about 1700m of ascent (but you end up 2 hours' road walk from the start). And plenty more the other side of the road for the next day.
The easiest big haul is the south Glen Shiel ridge, starting from the Cluanie Inn: 7 munros for about 1700m of ascent (but you end up 2 hours' road walk from the start). And plenty more the other side of the road for the next day.
In reply to Russell Lovett: Glen Shiel.
In reply to Russell Lovett: Glen Shee. An early start on a long summer day will bag you 13 Munros if you also go for Mayar and Dreish. Excluding those it's an easy 11 from Creag Leacach to Lochnagar with no summits demanding any big climbs once on the plateau.
In reply to Russell Lovett: South Shiel Ridge for maximum Munros minimal effort. You can extend that to 9 with Sgurr na Sgine and the Saddle for a big day. Harder days are North Shiel Ridge (up to 7), Mamores (up to 10), Fannaichs (up to 9).
In reply to Steve Perry: I want to try that some day! SOme friends told me they met a guy on The Cairnwell lying in the grass sunbathing who'd started on Lochnagar that morning and was now nearing summit #14.
In reply to Russell Lovett:
If you're prepared to run sections, the first recorded ascent of 24 munros in 24 hours was in Kintail (incl S Glen Sheil) so it's prime bagging territory.
If you are only going for one day though you can pick and choose the day before you go based on weather forecast. Weather will have a huge impact on what you can achieve. I wouldn't advise going for pure numbers though; even if you're only aiming for compleation (which i don't think is actually the case for anyone) a day's effort is a day's effort. 9 glen shiel munros is a similar effort to Ceathreamhnan and satellites frequently done from the same starting point. 3x as many munros, same % of the compleation effort.
In reply to kwoods:
That's more than possible for a hillwalker around Glen Shee.
I've done your South Glen Shiel Ridge to the Saddle via Sgurr na Sgine with a full pack on, it's not too hard. The 5 sisters, Brothers and Ciste Dubh is tougher on the North side and a great day.
> (In reply to Steve Perry) I want to try that some day! SOme friends told me they met a guy on The Cairnwell lying in the grass sunbathing who'd started on Lochnagar that morning and was now nearing summit #14.
That's more than possible for a hillwalker around Glen Shee.
I've done your South Glen Shiel Ridge to the Saddle via Sgurr na Sgine with a full pack on, it's not too hard. The 5 sisters, Brothers and Ciste Dubh is tougher on the North side and a great day.
In reply to Slugain Howff:
With an early start, it's not unreasonable to do them all in a day.
> (In reply to Russell Lovett)
>
> You can cram more than a few Mamores in a long day
>
>
> You can cram more than a few Mamores in a long day
>
With an early start, it's not unreasonable to do them all in a day.
In reply to Steve Perry: I found the North pretty tough. Did it on a 13 hour baking summer day, dehydration was a problem on the Sisters. Got to walk out the front door of the Cluanie and in the front door of Kintail Lodge for drinks and fish and chips just short of last orders.
In reply to Russell Lovett: Have a look at Ken Wilson's The Big Walks
In reply to Russell Lovett: Glen shied seams to be very popular will google it now. Cheers for the replys.
In reply to Sharp: Glen Shiel seams to be popular choice, will google it now. Cheers for the replys.
In reply to Russell Lovett:
You also get 7 in a horseshoe if you do the Ben Lawers group from Glen Lyon - a long day, but I did it when I was 11 and it's no harder than the South Sheil Ridge.
You also get 7 in a horseshoe if you do the Ben Lawers group from Glen Lyon - a long day, but I did it when I was 11 and it's no harder than the South Sheil Ridge.
In reply to Russell Lovett:
If very fit and with plenty of day light you can add the North Shiel munros onto the south Shiel ridge as well. Though a pint at the Cluannie and a hitch down the Glen after the South Sheil ridge makes a fine end to a grand day and maybe more tempting than the re-ascent on the north side.
If very fit and with plenty of day light you can add the North Shiel munros onto the south Shiel ridge as well. Though a pint at the Cluannie and a hitch down the Glen after the South Sheil ridge makes a fine end to a grand day and maybe more tempting than the re-ascent on the north side.
In reply to Stuart S: Would agree with that. I would go further and say it's easier though I had perfect weather on that and fronts coming in on the South Shiel..
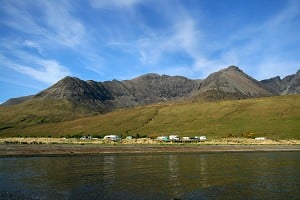
In reply to Russell Lovett: how about the Cuillin? 12 if you include Blaven...
In reply to Russell Lovett: Another that hasn't been mentioned yet would be the Lochaber traverse. Starting with Stob Ban(grey corries)and finishing on the Ben i think there is about 8 munros(not sure without checking). One for a long summer day this one.
In reply to Stuart S:
5, shurely? Or is there some new mathematics since 1971 or whenever it was I did it.
jcm
> (In reply to Russell Lovett)
>
> You also get 7 in a horseshoe if you do the Ben Lawers group from Glen Lyon - a long day, but I did it when I was 11 and it's no harder than the South Sheil Ridge.
>
> You also get 7 in a horseshoe if you do the Ben Lawers group from Glen Lyon - a long day, but I did it when I was 11 and it's no harder than the South Sheil Ridge.
5, shurely? Or is there some new mathematics since 1971 or whenever it was I did it.
jcm
In reply to johncoxmysteriously:
I'm guessing Stuart means Meall Greigh, Meall Garbh, An Stuc, Ben Lawers, Beinn Ghlas, Meall Corranaich, Meall a' Choire Leith.
(An Stuc was 'promoted' back in the 'nineties.)
I'm guessing Stuart means Meall Greigh, Meall Garbh, An Stuc, Ben Lawers, Beinn Ghlas, Meall Corranaich, Meall a' Choire Leith.
(An Stuc was 'promoted' back in the 'nineties.)
In reply to Douglas Griffin:
Yes, quite right, it was six even back then. I don't count these post-277 arrivistes.
jcm
Yes, quite right, it was six even back then. I don't count these post-277 arrivistes.
jcm
In reply to Stuart S:
I know someone – a strong walker, admittedly – who did the Lawers 7, the Mairg 4 and Schiehallion in a day. Re Glenshee options, the easiest way to hit double figures could well be to cross the road. In good summer conditions a few years ago I started and finished at the car park a couple of km north of the pass and took in the standard six on the east side of the road, plus a diversion out to Cairn Bannoch and Broad Cairn, then finished off with Cairnwell/Carn Aosda. Took just under 9hr40 of which over an hour was spent sitting around, and overall it felt quite a lot easier than various single-figure Munro days eg the Inverlochlarig 7 or the Eunaich+Chochuill+Cruachan traverse (both of which are very good and recommended, as is any kind of big Shee/Isla loop).
> You also get 7 in a horseshoe if you do the Ben Lawers group from Glen Lyon
I know someone – a strong walker, admittedly – who did the Lawers 7, the Mairg 4 and Schiehallion in a day. Re Glenshee options, the easiest way to hit double figures could well be to cross the road. In good summer conditions a few years ago I started and finished at the car park a couple of km north of the pass and took in the standard six on the east side of the road, plus a diversion out to Cairn Bannoch and Broad Cairn, then finished off with Cairnwell/Carn Aosda. Took just under 9hr40 of which over an hour was spent sitting around, and overall it felt quite a lot easier than various single-figure Munro days eg the Inverlochlarig 7 or the Eunaich+Chochuill+Cruachan traverse (both of which are very good and recommended, as is any kind of big Shee/Isla loop).
In reply to Russell Lovett: for both sides of Glen Shiel there may be the option of using the Citylink buses to Skye to cut out the road walking along the glen before/after the traverse http://www.citylink.co.uk/timetables.php I'm sure there may be other public transport options that open up one way traverses - the train to/from Fort Bill to Corrour springs to mind.
In reply to Karl Lunt:
You can hitch. It's a fast road so you have to look at the driver and smile nicely. Also give them plenty of warning and give them a place to stop. Even if that fails, other walkers know why you are hitching and will stop.
You can hitch. It's a fast road so you have to look at the driver and smile nicely. Also give them plenty of warning and give them a place to stop. Even if that fails, other walkers know why you are hitching and will stop.
In reply to Russell Lovett:
As an alternative to those mentioned I did Ben Starav from Victoria Bridge near Bridge of Orchy in October, the result was 7 Munros, just under 30miles, a third of which was fairly flat along the glen getting back to the start.
As an alternative to those mentioned I did Ben Starav from Victoria Bridge near Bridge of Orchy in October, the result was 7 Munros, just under 30miles, a third of which was fairly flat along the glen getting back to the start.
In reply to Andy Nisbet:
We must have been unlucky when we did it - we had to walk all the way back up the glen!
We must have been unlucky when we did it - we had to walk all the way back up the glen!
In reply to Thickhead: That's a tough one! Good track beyond Loch Dochard then when you cut up to Beinn nan Aighenan it's all deep grass and heathery rubbish for a few miles. Though I remember getting up to the Aighenan ridge and ending up on this stony plateau covered in weird weathered stones, framed by the Cruachan Range in the sun. Pretty cool.
By Meall nan Eun, I couldn't imagine continuing to Ghabhar!
By Meall nan Eun, I couldn't imagine continuing to Ghabhar!
In reply to kwoods:
It was a good day out! Definitely more challenging than the S Glen Shiel Ridge.
Probably easier doing glen dochart at the end of the day... Easier coming down through heather. The good thing about the route is you can come off the ridge early in quite a few places if you feel it's too long, weather etc.
I might be going up to Scotland in March so interesting to read about other suggestions of big days out. Thinking of Dalwhinnie area at the moment as there are loads of Munroes there that I haven't done.
In reply to Russell Lovett:
http://www.amazon.co.uk/Great-Mountain-Days-Scotland-Hillwalking/dp/1852846...
I'm surprised Dan himself hasn't posted, perhaps he is suffering from Christmas excess.
http://www.amazon.co.uk/Great-Mountain-Days-Scotland-Hillwalking/dp/1852846...
I'm surprised Dan himself hasn't posted, perhaps he is suffering from Christmas excess.
In reply to Dave Hewitt:
The Glenshee 9 race does this
http://www.glenshee9.co.uk/
Only 21 miles/6000 feet ascent, so adding your extras will still give a doable (if long) day. We managed the standard 6 in a single December day, and did 6 from Glen Clova one February (one of the others added Lochnagar to make 7, with more daylight we could have added Driesh and Mayar).
> Re Glenshee options, the easiest way to hit double figures could well be to cross the road
The Glenshee 9 race does this
http://www.glenshee9.co.uk/
Only 21 miles/6000 feet ascent, so adding your extras will still give a doable (if long) day. We managed the standard 6 in a single December day, and did 6 from Glen Clova one February (one of the others added Lochnagar to make 7, with more daylight we could have added Driesh and Mayar).
In reply to drmarten: Just an excess of nappy changing - I missed the thread. Ticklists aren't personally my thing but there are still plenty of multi-Munro (& corbett) options in that book.
In reply to Dan Bailey - UKHillwalking.com:
http://www.ukclimbing.com/logbook/set.php?id=39
> Ticklists aren't personally my thing
http://www.ukclimbing.com/logbook/set.php?id=39
In reply to Toreador: OK, 'other people's ticklists'...!
In reply to Toreador:
Interesting, ta. Looks like the standard eastern six plus those western three is the easiest nine, while the route I did is the easiest ten – so combining the two, ie taking in Carn a’Gheoidh, Cairn Bannoch and Broad Cairn, is the easiest 11. It’s quite a long way from Tom Buidhe to Mayar (I did that last summer as part of a Glen Doll loop and it took just under 2hr to walk that stretch, although that included a stop on Finalty Hill), while extending out towards Lochnagar likewise adds time/effort if trying to return to a start-point.
The route I took for the ten was almost identical to the race route for the eight Munros covered by both routes, although the other way round and starting/ending at the northern road-crossing rather than the pass. Other than that, the only difference is that I split Tolmount and Tom Buidhe, taking in Cairn Bannoch and Broad Cairn between. Took me 32 mins from Tolmount to Fafernie, then ten mins to Cairn Bannoch and a further 28 mins to Broad Cairn, sticking to the crest en route. The quickest way back to Tom Buidhe is probably to reverse, then skirt the east side of Tolmount, but I took the cross-country option for a bit of sightseeing – this required 76 mins from Broad Cairn to Tom Buidhe. It’s quite squelchy in a couple of places in the dips on that section. Although I was only walking I was in Walshes, and at one point found myself hopping about on one leg as one of my shoes had been sucked right off by a particularly gluey bit of bog. It had been swallowed completely – couldn’t see it – but a bit of fishing and delving saw it retrieved.
I’ve noticed more than once that the stretch back to the pass from Creag Leacach is deceptively long, even though there’s not much height-loss. Re the final section (as I did it), the two western Munros took just under 100 mins from crossing the road at the pass to getting back to the car. About ten mins of this was spent lounging on the summits, as I was getting a bit puggled by this stage.
In reply to Russell Lovett: have a look at Ben Alders area
This topic has been archived, and won't accept reply postings.


Loading Notifications...