Updates - Tutorial
-
Getting Started
Updates can only be added to crags and buttresses that exist in UKC Logbooks. Get the UKC Logbook crag listing in order first before you create a topo. Add buttresses and routes where they don't exist and ensure that the routes are listed left-to-right.
You can create an update from your own updates homepage or from the updates tab on a crag page on UKC Logbook. Existing updates you have access to appear as thumbnails on your updates homepage. -
Choose a Crag
Updates can only be added to crags so you first need to select a crag. If no crag exists, then it needs to be added to the logbooks here. If required, multiple updates can be added to the same crag. -
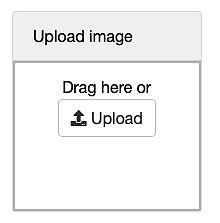
Add a Topo Image
-
Add Routes to a Topo Image
Click to choose which routes are to be included in this update (more can be added at any time) from the chosen crag.
-
Add Data to a Route
Click to begin editing a route.-
Draw a Route Line
Click to start drawing mode.
Click where the route starts and plot the route in the direction it is climbed by adding points all the way up the route.
Once you have finished, click (or click the last point again).
-
Add a Belay/Lower-off
Click to place a belay or lower-off on the route line then click the correct point on the line for the belay/lower-off. You can add extra belays to a route line for multi-pitch routes but only to points on the line so make sure you create a click point on each belay when drawing the route line.
-
Edit a Route Line
Click - this creates smaller points between the original points which you can click on to create a new point which can then be moved to refine the route line (or for a belay position). Click to confirm the changes to the line.
-
Edit a Belay/Lower-off
Click on a route then click on an existing belay/lower-off on that route to set its type. Choose unequipped (trad) or equipped (sport) and if it is a lower-off. Click after making the anchor changes. You can also move or delete a belay/lower-off using this edit box.
-
Move a Route Label
Click then click to place the label (route number) anywhere on the route line. This is done to give the topo clarity, to avoid obscuring other lines or where routes branch.
-
Finish Editing a Route
Click next to the route line or click next to another route you want to edit to finish a route.
-
-
Using the Topo Editor
The topo can panned around and zoomed in and out.
when enabled will auto-zoom to the route you begin editing.
when enabled displays the route names on the route lines. -
Submit an update
You can save your update as a draft whenever you want, and it will appear on your updates homepage. Once finished, submit the update for moderation. The update will then be reviewed, which may take a day or so, and made public if appropriate.
Once approved you will get an email to inform you.
If there is a problem with the update then you will get an email so that you can address it and re-submit.
An approved update is instantly visible on the crag page. You can continue to make minor tweaks to the update, with changes being instant without need for moderation.