Rockfax Description
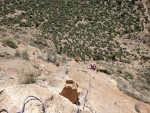
A huge route which goes all the way to the top of the mountain at a maximum grade of 5+. No precise details are known but the line appears to be fully equipped. The pitches on the topo are: 1) 5+, 2) 5, 3) 4, 4) 5, 6) 5, 7) 5. Then walk across rightwards for 5m.8) 5+, 9) 5. Another 50m walk to the right. 10) 4+.Descent - Head right (looking out and scramble down the slope then walk back left to the top abseil station on the topo above.Descent - Head right (looking out and scramble down the slope then walk back left to the top abseil station on the topo above. © Rockfax
Feedback
| User | Date | Notes | ||
|---|---|---|---|---|
| Steve Woollard | 1 Feb, 2023 |
Show βeta
βeta: Possible to walk off after pitch 6, but pitch 7 possibly the best one on the climb | βeta? | |
|
Show beta
βeta: Possible to walk off after pitch 6, but pitch 7 possibly the best one on the climb |
||||
| Pero | 3 Mar, 2020 |
Show βeta
βeta: The first two pitches are straight up, starting from the plaque with the route name. Take 18 draws. Could just about be done with a 60m rope. P1: 35m (I'd say this has a 6a move in the middle). P2: 25m (5+ at most) Walk about 30m up and right to another plaque at the bottom of P3. P3-4 can be run together (55m, 5) P5: rising rightwards traverse, then descend a few metres to belay (40m, 5) P6: continue traverse for a few metres, then up directly (55m, 5/5+) Scramble traverse about 100m up and right, then up to a cave (another plaque) P7: steep moves (5+), then easy up to a wall to finish (5) (55m, 18 bolts) P8: continue upwards more easily (40m, 4+) Another 100m scramble traverse right with one or two bolts on the way. Look for double bolts a little higher, above a nice ledge to belay on. No plaque this time. P9: directly up to final belay (60m, 4) The summit is worth a visit for the views. Descent: follow the walking/easy scramble path to Redovan, identified by green and white markers. No need for any abseils. | βeta? | |
|
Show beta
βeta: The first two pitches are straight up, starting from the plaque with the route name. Take 18 draws. Could just about be done with a 60m rope. P1: 35m (I'd say this has a 6a move in the middle). P2: 25m (5+ at most) Walk about 30m up and right to another plaque at the bottom of P3. P3-4 can be run together (55m, 5) P5: rising rightwards traverse, then descend a few metres to belay (40m, 5) P6: continue traverse for a few metres, then up directly (55m, 5/5+) Scramble traverse about 100m up and right, then up to a cave (another plaque) P7: steep moves (5+), then easy up to a wall to finish (5) (55m, 18 bolts) P8: continue upwards more easily (40m, 4+) Another 100m scramble traverse right with one or two bolts on the way. Look for double bolts a little higher, above a nice ledge to belay on. No plaque this time. P9: directly up to final belay (60m, 4) The summit is worth a visit for the views. Descent: follow the walking/easy scramble path to Redovan, identified by green and white markers. No need for any abseils. |
||||
Logged Ascents
18 users have logged this
Guidebooks for Redovan
Not all climbs at crag may appear in this book 29 users have this on their wishlist
Please Login to view more details on the logged ascents
Route of Interest
La Cantera
Grade: 5c ***
(Callosa)