Rockfax Description
A prolonged and varied tour that requires care with the rock and route finding in places. Start just right of a huge block that leans against the base of the cliff.
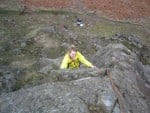
1) 4a, 20m. Follow the clean steep wall slightly rightwards to a belay under the band of overhangs.
2) 12m. Traverse left and follow a steep but short arete to a tree belay on the left.
3) 13m. Move up past a pinnacle on the right and take the wall, ledge and short corner to a large ledge and tree belay.
4) 4b, 11m. Take the horizontal weakness across the wall to the rib on the right and follow this to a ledge and belay. This pitch is known as 'The Black Wall'.
5) 20m. Head up and then leftwards above a smooth wall until clear of an overhang. Move up to a belay.
6) 13m. Move right and take the wall to scrambling which leads to the top. © Rockfax
Ticklists
Connoisseur's Classic Rock , Lakeland's Best Multi-pitch Routes up to HVS , Lakeland's Greatest Pioneers , "High & Wild" Arc'teryx Lakeland Revival 2019 Ticklist , Steve Ashton's 100 Classic Climbs The Lake District , Bill Birkett (Classic Rock Climbs in the Lake District) Below E3 , A Lakeland Apprenticeship , 50 more great HS routes , Turbo-Punter's Tradification , Lake District Multipitch Climbing
Feedback
| User | Date | Notes | ||
|---|---|---|---|---|
| mandyglanvill | 31 Aug, 2023 |
Show βeta
βeta: All rock sound now, Oaktree rather overgrown did pitch 2 and 3 together. | ||
|
Show beta
βeta: All rock sound now, Oaktree rather overgrown did pitch 2 and 3 together. |
||||
| cocomosey | 11 Jul, 2020 |
Show βeta
βeta: BEWARE LOOSE ROCK! I was very nearly killed by a huge falling cluster of blocks from Honister Wall on 10/07/2020. The rockfall was from the overhang on pitch 2 and fell from above me, over my shoulder as I lent on it before climbing the arete. One of my ropes was severed part way through the core. If I had linked pitches 1 and 2 the belayer would likely have been crushed at the belay spot on the ground. We bailed shortly after. Not sure if there is more fall to come but don't be below it to find out! | βeta? | |
|
Show beta
βeta: BEWARE LOOSE ROCK! I was very nearly killed by a huge falling cluster of blocks from Honister Wall on 10/07/2020. The rockfall was from the overhang on pitch 2 and fell from above me, over my shoulder as I lent on it before climbing the arete. One of my ropes was severed part way through the core. If I had linked pitches 1 and 2 the belayer would likely have been crushed at the belay spot on the ground. We bailed shortly after. Not sure if there is more fall to come but don't be below it to find out! |
||||
| Remyveness | 6 May, 2019 |
Show βeta
βeta: Fun route, with some good pitches, small wires and cams are near essential! | βeta? | |
|
Show beta
βeta: Fun route, with some good pitches, small wires and cams are near essential! |
||||
Logged Ascents
Guidebooks for Buckstone How
Not all climbs at crag may appear in this book 44 users have this on their wishlistPlease Login to view more details on the logged ascents
Route 2
Grade: HS 4b ***
(Raven Crag (Walthwaite))

