


 © Mick Ryan - UKClimbing.com
Luck favours the well prepared
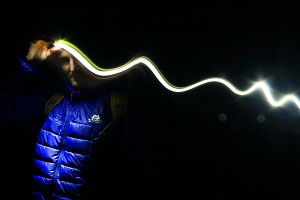
Never leave the valley without a reliable headtorch. LED torches have all but taken over nowadays and it's not hard to see why. The night vision friendly blueish light, fantastic reliability, battery life that the Duracell bunny would kill for and halogen comparable performance all means you don't need to look any further.
There are loads of superb torches out there but it's worth ensuring the one you choose has a few key features. Models with several light output levels help conserve battery power and help avoid dazzling you when you're looking closely at the map. It's also useful to have a beam that can be changed between a spot focus to help you pick out distant features and a wide-angle beam that's perfect for illuminating the ground in front of you as you walk.
There's also a good range of emergency mini headtorches that can live in your rucksack (I keep one in my first aid kit) but will still help get you out of a pitch-black pickle. Have a look at models like the Petzl Tikka range or even smaller options like Black Diamond's Ion or Petzl's E+lite.
Good weather resistance is also important in our 'interesting' climate, and make sure the head attachment system is secure so it doesn't keep toppling off your head. If you are likely to be wearing a helmet during your night time navigating then make sure your helmet has a reliable torch fastening system too.
"...There are loads of superb torches out there but it's worth ensuring the one you choose has a few key features..."
One final thing that many torches seem to suffer from is fiddly control buttons that are hard to use with cold fingers or when you have gloves on. Take your Everest thickness mitts along and check the buttons out in the shop – you may get some strange looks but you won't regret it when you're descending An Teallach in the early hours and need to quickly flick on your spot beam to see what lies ahead!

© Mick Ryan - UKClimbing.com
Having discussed torches it's worth mentioning that navigators are often very quick to flick their torch on at the first sniff of darkness but you can sometimes travel safely using moonlight instead. Once you start using your torch you're pretty much committed because your night vision takes a long time to readjust if you turn it off again.
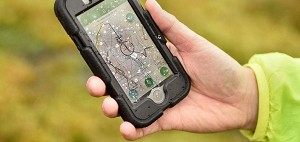
In terms of other equipment it helps if your compass has some of those little luminous markers on and choose a watch with clear digits and a stopwatch for timing distance. I also find an altimeter particularly useful at night as it can help determine your position on features like ridges and gently undulating featureless terrain. I've often used a GPS when practising night navigation as it can help to confirm you have got where you want to go and also allows you to relocate if you do find yourself 'temporarily misplaced' (also known as lost!). I always replace the batteries in my torch before each planned night navigation session and take a spare torch and batteries as well. Take a spare map and compass, extra clothes and plenty of food and drink too.
"...Most people feel time passes quicker than it actually does when they're estimating elapsed time at night. Trust your stopwatch..."
If you laminate map sections or use a map case try to find coverings with a matt finish because some of the shiny plastic types really bounce the light back. You can also reduce this effect slightly by shining your torch onto the map from the side if it's causing problems. Remember to keep your torch away from your compass if you are holding it in your hand though!
Practice makes perfect
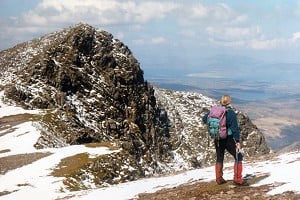
I'm sure I'd be right in thinking you became proficient at daytime navigation by practicing. Well, of course, that's also the trick with the night time version too. The problem is it takes a bit more commitment to head out after dark when you are missing East Enders – but it will be worth the effort! For your initial forays choose an area with plenty of interesting features to navigate between and a good relocation feature like a road in case things go pear shaped. Once you are completely comfortable navigating in this sort of terrain you can up the ante and try more challenging areas. It's also worth initially choosing nights with good weather so you don't have too much to deal with at once.
 © anderson405, Jan 2009
An easy way to get quality practice time without the worry of having to spend a night out is to go out a few hours before sunrise. That way if you do get lost you can just wait for daylight to arrive. This also means you can fit your night navigation practice into a bigger walk and that should give you more motivation to actually put the practice time in because you won't be having to make a special effort to get out in darkness.
It's a good idea to carefully plan your route in advance and mark the features onto your map with a marker pen. To do this effectively it's essential to understand the way features are represented on your map. How steep is that slope going to be? Will you end up at the top of that cliff or standing at the bottom of that outcrop instead? Working all this out beforehand ensures there is no confusion once you are under way. Go with someone else and don't forget to leave a route plan with someone too.
Time goes by...so slowly
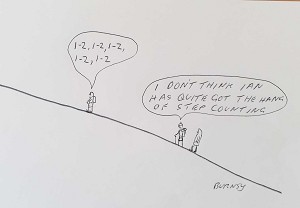
Madonna sang about it but I doubt she's ever night navved across Bleaklow! Most people feel time passes quicker than it actually does when they're estimating elapsed time at night. Trust your stopwatch and don't be tempted to ignore the information it's providing. The more you practice and become comfortable with the situation the less this will be an issue.
It's also common to think you have travelled further than you have when you are measuring distance by pacing. Practice will allow you to decide if your night paces are covering the same distance as your day paces and you can adjust accordingly. Remember that paces will be affected by snowy conditions and on some terrain you will slow down at night – try a night crossing of the Kinder Plateau after heavy rain and you'll know what I mean!
While we're talking about time, I always slow down my decision making and double check all my calculations at night. I figure the few extra minutes it takes is preferable to having to relocate because I've rushed into a bad choice. It's worth always getting your partner to make their own calculations and compare the results too.
Inch by inch it's a cinch, yard by yard its hard
I once sat in a motivational talk given, very bizarrely, by one of the Power Rangers. One of the things he pointed out was that breaking challenges down into manageable steps will help you to achieve your goal. Never has that advice been more relevant than when navigating at night. Two of your key techniques are compass bearings and careful distance measurement. These techniques are very accurate but they are also prone to error if you walk too far, not far enough or stray from your bearing. The best way to minimise the risk of this happening is to break each navigational leg into smaller sections than you might attempt in daylight. If you also use obvious features to aim for you should still be able to work out where you wanted to be even if you've gone a bit astray.
"...Everyone gets temporarily misplaced sometimes – its how you deal with it that really matters!
The first priority is to keep calm..."
It's also worth thinking of each navigational leg as a journey. As you plan it on the map you can then identify individual features you will 'tick off' on the way: The stream after 50 metres then the rocky outcrop after 150 metres. Tick off features give you the confidence that you are on track but also allow you to quickly address the problem if the features you encounter doesn't match your journey plan.
I followed a 176 for 150 then handrailed the wall to the attack point
If you listen to a bunch of orienteers recounting their course you could easily be mistaken for thinking you are listening to a different language - they love jargon! But, once you actually fathom out the terms they are using you'll see they refer to navigational techniques you already use all the time....
 © Mark Lewis
Try to choose features that also have a catching feature beyond: I'll head for that stream junction but if I go too far I will come to the wall 50 metres beyond. Linear features, or 'handrails', are long features that can be useful at night. They can be things like landscape features, streams, roads or walls and are usually easily identifiable on your map and the ground. However, at night it is essential that you use some handrails with great care as they can follow dangerous terrain that you can't see with your headtorch. For example, streams that drop down steep gullies or ridge lines with steep walls on either side.
A gathering feature is two line features that join such as a 2 walls or streams and they can provide useful confirmation of your location: I'll follow the stream (line feature) until I get to the stream junction (gathering feature). Even better if you also have a catching feature incase you go too far.
'Aiming off' is a useful way to avoid compass bearing deviations turning into a major problem. For example, rather than trying to take a compass bearing straight to that key wall junction, aim off by taking the bearing straight to the wall right of the junction. Then once you meet the wall you will know you just need to turn left and follow the wall along.
In daytime you probably travel on your compass bearing by sighting along your line of travel and picking terrain features to head for. This is a great way to ensure you don't stray from your bearing. You can use the same method at night even though you won't be able to use features so far ahead: That tuft of grass at 50 metres then that small rock after 30 metres etc. If the terrain is completely featureless you can send your partner in front and sight on them – just make sure you don't lose each other!
Don't Panic Captain Mannering!
Everyone gets temporarily misplaced sometimes – its how you deal with it that really matters! The first priority is to keep calm. It's easy to start getting panicky but there's no more reason to be nervous at night than there is in daylight. After all, the same things are there! The strategies available to you are the same as those you'd use in daylight and I won't go over stuff you already know. Stop for a few minutes, study your map and the features around you and make a plan. Having a drink and some food will also provide a bit of comfort and feed your brain cells. Then, when you're ready put your plan into action and see how it goes. If it doesn't get you where you want to go just make a new plan.
There really is nothing to fear about navigating at night. Infact it can be a very liberating experience and there's a real buzz of being able to get around the hills safely and confidently in the dark. The other advantage is you'll almost certainly get the mountains to yourself! If you want some extra input you can always book on to a navigation course but check that a night navigation element is included as many courses just run in the daytime. If you can't find a course that fits the bill most instructors will be happy to run a session for you.

Paul Lewis is the owner of mountain adventure and training specialists Peak Mountaineering. Paul offers a 15% discount on all courses for UKC users. Find out more at peakmountaineering.com or contact Paul on 01433 620283.
UKH Articles and Gear Reviews by peakpaul
- Montane Torque 40 rucksack 30 Oct, 2013
- Petzl Nao Head Torch 10 Jul, 2012
- How To: Make An Emergency Snow Shelter 20 Dec, 2011
- What Gear To Take: Scrambling 10 Aug, 2011
- Who is AMI? 18 Mar, 2010
- RAB Neutrino 20 Mar, 2009
- Mountain Equipment Kongur MRT 6 Jan, 2009
- REVIEW: Crampons - Everything you need to know! 21 Oct, 2008
- The Lord of the Swings... Walking Axes 2 Oct, 2008


Comments